
Avoid these mistakes and prevent expensive callbacks.
Brought to you by Marvin
If you want to end up with an energy efficient, smooth operating, and long-lasting window, every step of the window installation process needs to be executed with the greatest attention to detail. Here are some of the most common window installation mistakes and some useful tips that will help you avoid them.
Wrong size rough opening
The rough opening requirements for a 2-x 3-foot window will vary depending on the manufacturer and the style of the window. A window can be built to fit almost any rough opening size, but many manufacturers build “standard” sizes which cost less than custom built windows.
Wrong size jambs
When ordering windows with the jambs attached, be sure to add to the width of the jambs if the finished surface of the interior walls is going to be plaster, tongue and groove, or any other material thicker than ½ inch drywall. You’ll also need to add to the width of a jamb when installing windows onto sheathing that is thicker than 7/16 of an inch.
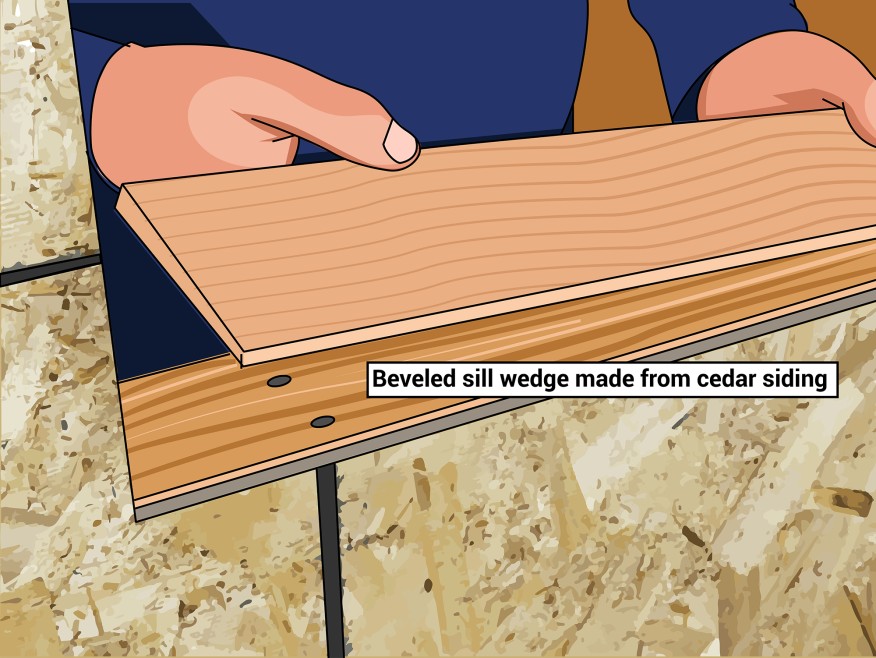
No back slope
The sill on a rough opening should be sloped so it can direct water that has penetrated the building envelope back to the outdoors. This can be accomplished by cutting the cripple studs at an angle or by adding a sill-wedge or sloped pan after the rough opening has been framed in. Don’t forget to add to the height of the rough opening to accommodate the thickness of a sill-wedge or sloped pan.
Poor flashing adherence
One common window installation mistake is not brushing away dust and debris and wiping off moisture from window sills and the WRB (weather-resistant barrier) to improve the adherence of flashing tapes and membranes. Some tapes and membranes won’t adhere in cold weather, so try to find a product that does or be sure to follow the manufacture’s specific cold-weather guidelines. Some cold-weather solutions will include adding primers prior to installing the flashing, so read the instructions beforehand so you’ll have all the necessary materials come installation day.
Securing nailing fins without checking window
A bent or angled nail can push or pull a window out of place. As you fasten the fins, check and recheck that the window continues to operate properly and that it remains centered, level, plumb, and square.
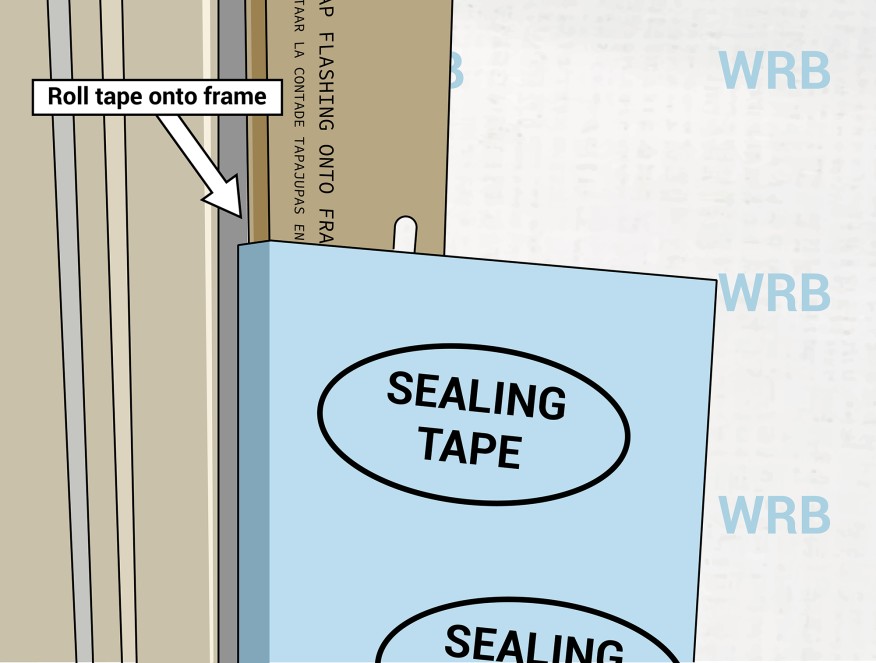
Not sealing the nailing fins
In addition to sealing underneath the nailing fins, fins that are not an integral part of the window unit need to be sealed to the frame. The best way to accomplish this is to roll the flashing tape/membrane over the fin and up onto the edge of the window frame.
No back dam A back dam on the sill will help prevent unwelcome water from reaching the wall cavity and the interior of the building. A back dam can be created with a strip of wood under the sill flashing, incorporated into a rigid sill pan. It should be installed after the window, bedding the strip in a thick bead of sealant to create a tight air seal.
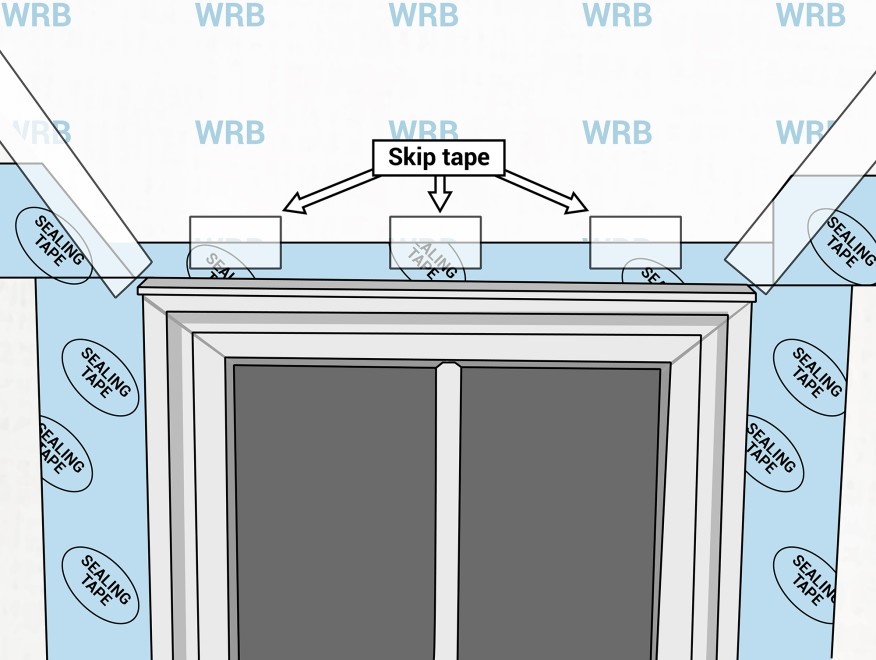
Improperly installed head flashing
Rigid head flashing, sometimes referred to as drip cap, should be incorporated into the window flashing system, not installed after the fact. Check out this step-by-step video that demonstrates the process.
Misuse of spray foam
Filling the cavity around the perimeter of the window with expanding spray foam may bow wood jams or even distort a window frame. Use only a non-expanding foam sealant to create an air seal.
Try to avoid smearing foam and sealant on any of the finished parts of the window. It’s especially difficult to remove stains from unfinished wood. Keep an extra pair of gloves on hand for applying foam and sealant for window installation.
Not following the instructions
While all windows share similar installation procedures, most of them have unique requirements based on extensive laboratory and field testing. If you want to get the most out of every window you install and avoid expensive callbacks, it’s important to follow each of the manufacturer’s instructions down to the smallest detail.